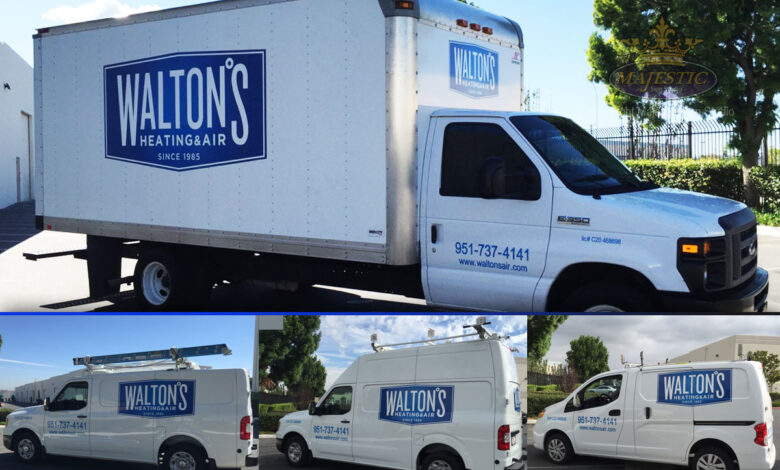
In today’s competitive market, businesses must leverage every opportunity to promote their brand. One of the most effective ways to achieve this is through custom fleet vehicle graphics. These graphics transform ordinary vehicles into mobile billboards, capturing the attention of potential customers wherever they go. In this article, we will explore the benefits of fleet graphics, design options, installation tips, and maintenance practices to ensure your investment pays off.
What Are Fleet Vehicle Graphics?
Fleet vehicle graphics are custom designs applied to a company’s vehicles. They can include logos, contact information, taglines, and eye-catching visuals that represent the brand. These graphics can be used on various vehicles, including cars, trucks, vans, and trailers, turning your fleet into a cohesive branding tool that works 24/7.
Benefits of Fleet Vehicle Graphics
- Increased Brand Awareness: Fleet graphics provide constant exposure for your business. Every time your vehicles are on the road, they are seen by potential customers, increasing brand recognition and visibility.
- Cost-Effective Advertising: Compared to traditional advertising methods, fleet graphics offer a high return on investment. Once the graphics are installed, they require no ongoing costs and can last for years.
- Professional Image: Custom graphics give your vehicles a polished and professional appearance. This enhances your credibility and instills trust in potential clients.
- Targeted Marketing: Fleet graphics allow businesses to reach specific audiences in targeted locations. As your vehicles travel to different areas, they can attract customers in those regions.
- Versatility: Fleet graphics can be customized to suit various vehicle types and sizes. This flexibility means businesses can create unique designs that fit their specific needs.
Types of Fleet Vehicle Graphics
- Full Wraps: Full wraps cover the entire surface of a vehicle, providing maximum visibility. This option allows for vibrant, eye-catching designs that are impossible to ignore.
- Partial Wraps: Partial wraps cover specific areas of the vehicle, such as the sides or back. This option is often more budget-friendly while still making a strong visual impact.
- Vinyl Decals: Vinyl decals are smaller graphics that can be applied to various parts of the vehicle. They can be used to display logos, contact information, or promotional messages.
- Magnetic Signs: Magnetic signs are removable graphics that can be easily placed on and taken off vehicles. This option is ideal for businesses that want temporary advertising or need to change their graphics frequently.
- Window Graphics: Window graphics can be applied to the windows of vehicles. These graphics can be perforated to allow visibility from the inside while displaying vibrant designs on the outside.
Design Considerations for Fleet Vehicle Graphics
- Brand Consistency: Ensure your graphics align with your overall branding strategy. Use consistent colors, fonts, and logos to create a unified look across all vehicles.
- Simplicity: Keep your design simple and easy to read. Avoid cluttered layouts and excessive text, as these can distract from your message.
- High-Quality Images: Use high-resolution images and graphics to ensure clarity and professionalism. Blurry or pixelated designs can harm your brand image.
- Color Contrast: Utilize contrasting colors to make your graphics stand out. Bright colors catch the eye, while dark colors can add sophistication.
- Call to Action: Incorporate a clear call to action in your design. This could be a phone number, website, or social media handle, encouraging potential customers to engage with your brand.
Installation Process for Fleet Vehicle Graphics
- Surface Preparation: Clean the vehicle surfaces thoroughly to remove dirt, dust, and oils. This step is crucial for ensuring proper adhesion of the graphics.
- Measuring and Planning: Measure the vehicle to determine the best placement for the graphics. Consider visibility from various angles and distances.
- Applying the Graphics: Start by peeling off a small section of the backing and positioning the graphic on the vehicle. Use a squeegee to smooth out any bubbles, working from the center outward.
- Trimming Edges: After the graphic is applied, trim any excess vinyl along the edges to achieve a clean look. Ensure that the graphics follow the contours of the vehicle.
- Curing Time: Allow the graphics to cure for the recommended time before exposing them to harsh weather conditions. This ensures optimal adhesion and longevity.
Maintaining Your Fleet Vehicle Graphics
- Regular Cleaning: Clean your vehicles regularly to keep the graphics looking fresh. Use mild soap and water to avoid damaging the vinyl.
- Avoid Harsh Chemicals: Steer clear of abrasive cleaners and solvents that can harm the graphics. Stick to gentle cleaning solutions.
- Inspect for Damage: Regularly check for signs of wear, such as peeling or fading. Address any issues promptly to prevent further damage.
- Protect from Extreme Conditions: If possible, park vehicles in shaded areas or garages to protect the graphics from prolonged exposure to UV rays and extreme weather conditions.
- Reapply as Needed: Over time, graphics may fade or become damaged. Be prepared to reapply or update your graphics to maintain a professional appearance.
Conclusion
Custom fleet vehicle graphics are an effective way to enhance your brand visibility and create a professional image for your business. By investing in high-quality graphics and following best practices for design, installation, and maintenance, you can turn your vehicles into powerful marketing tools.
Whether you choose full wraps, partial wraps, or vinyl decals, custom fleet graphics can help your business stand out in a crowded marketplace. Embrace the opportunity to maximize your brand exposure with fleet vehicle graphics that capture attention and drive customer engagement.


